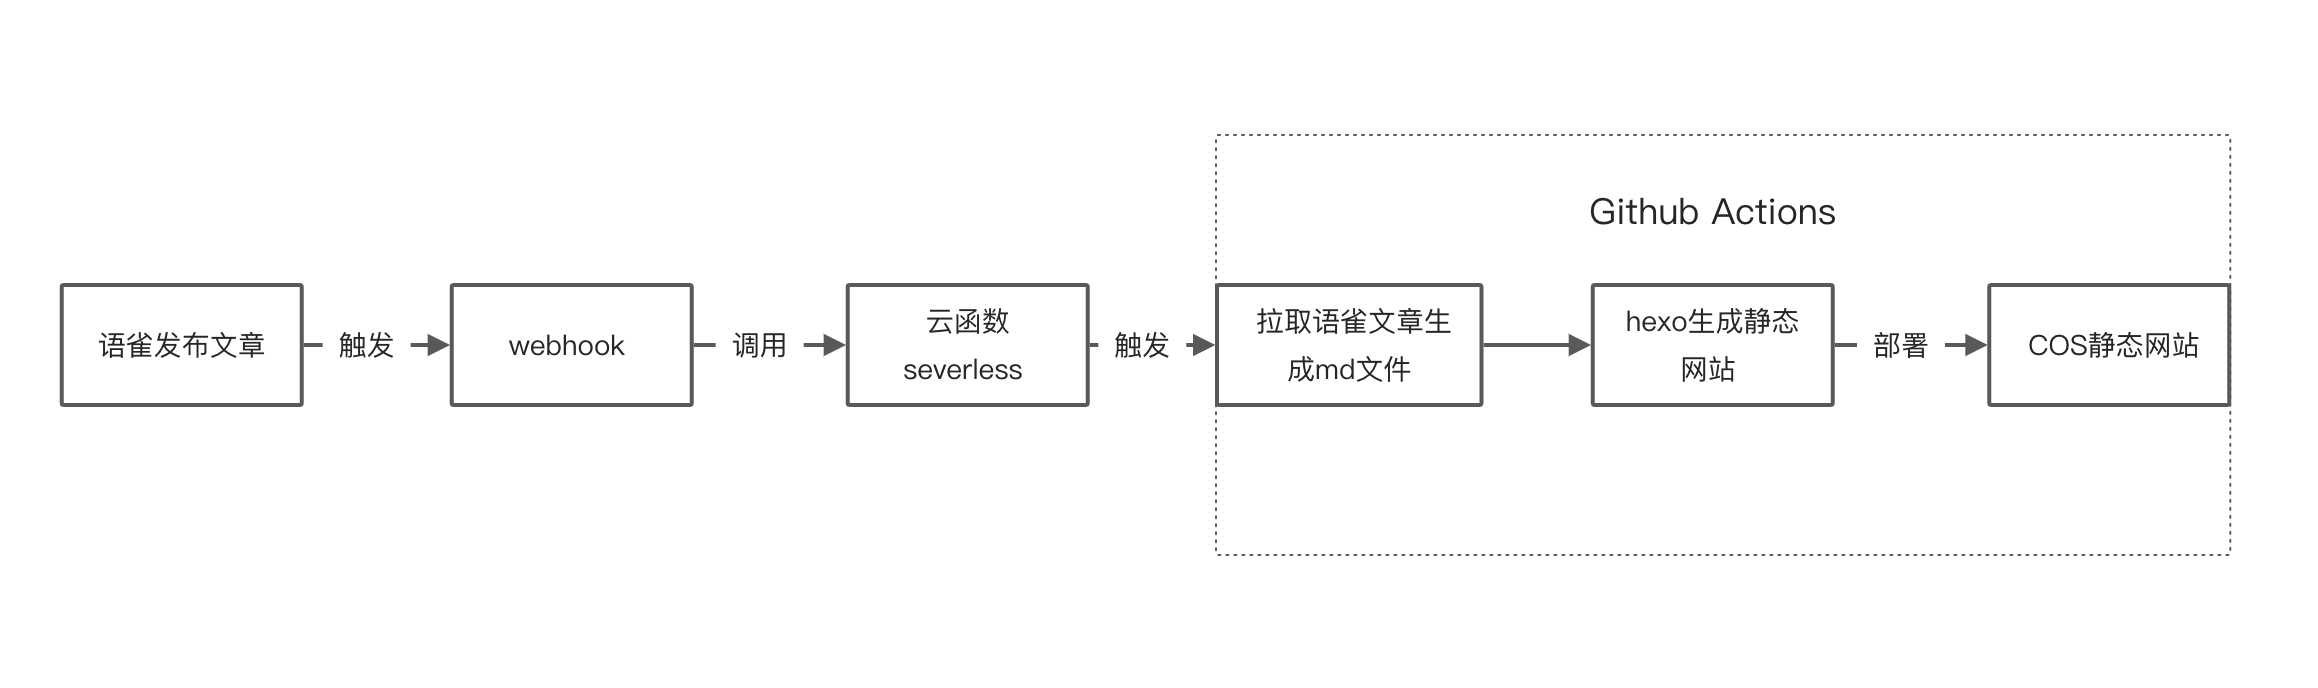
本文的目的是实现
语雀文章编辑发布后,调用Serverless触发**GitHub Actions** 自动同步到github pages前提条件:已经利用 github pages 成功搭建博客(没有的可查看我的这篇文章:[《github + hexo 搭建个人博客》](https://www.yuque.com/docs/share/a1387795-783d-45bb-b667-e7546de25d3b?# 《github + hexo 搭建个人博客》) )
部署流程
配置语雀 Token
账户设置 => Token => 新建 Token 并配置好权限 Access Token 即为 YUQUE_TOKEN
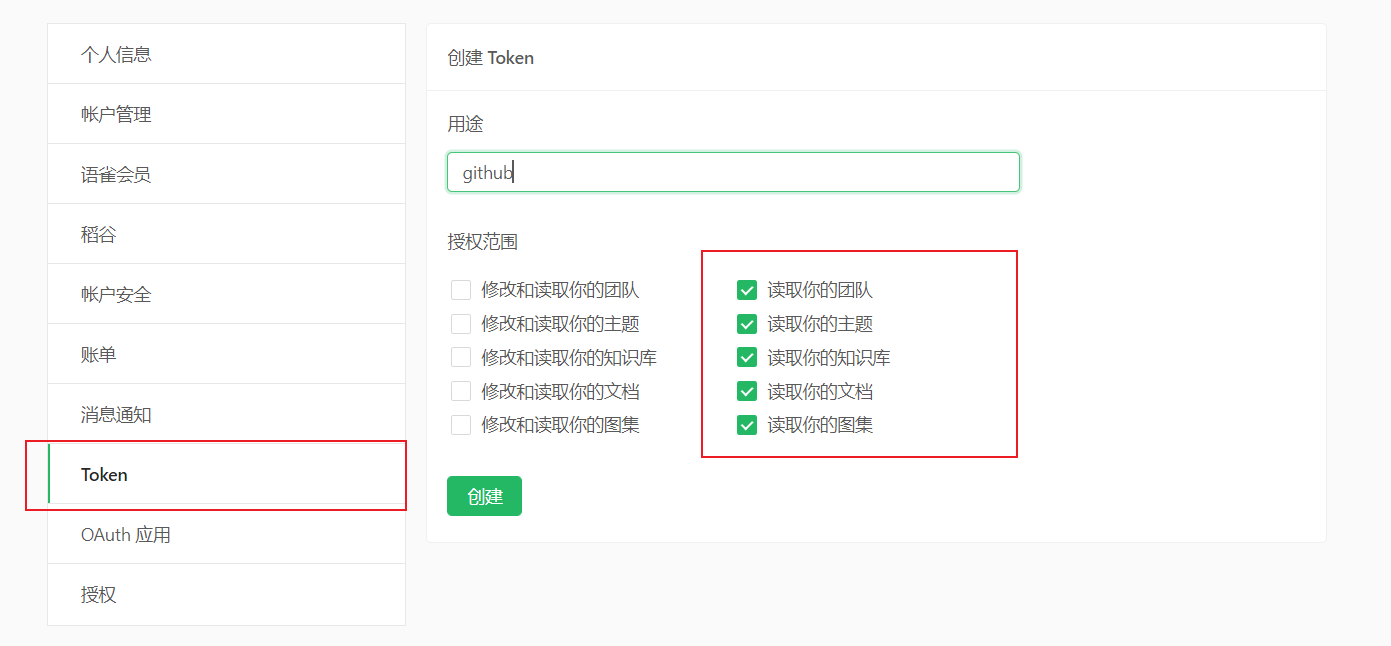
创建以后, 复制下来, 配置 hexo 的时候要用到
安装 yuque-hexo 插件
官方文档:yuque-hexo
安装
1 | npm install yuque-hexo --save |
配置 hexo
1 | { |
配置 Github
在 Github 创建仓库, 并将博客的源码上传到该仓库
Github 生成 token
点击头像 > setting > Developer settings > Personal access tokens > Generate new token
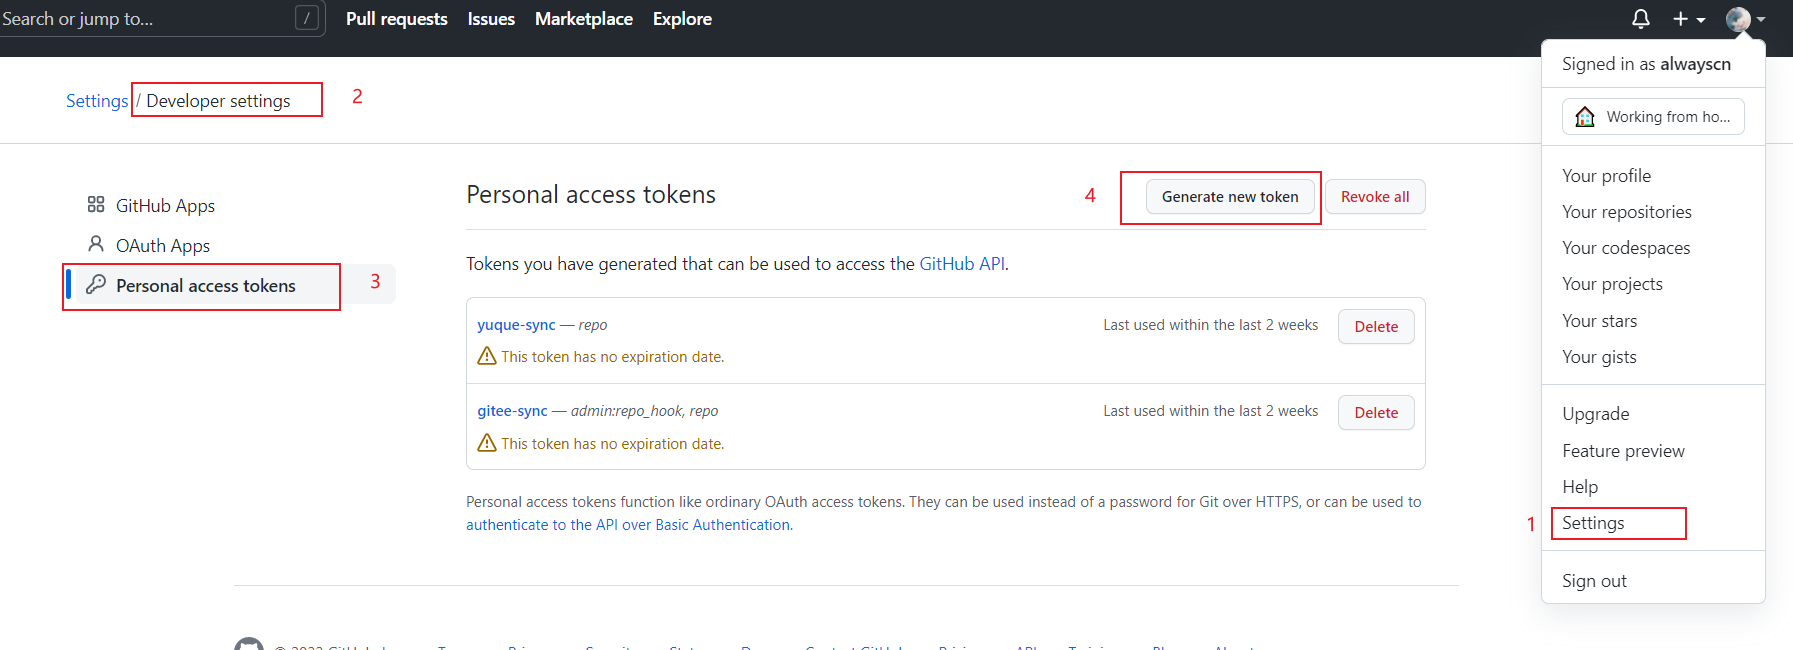
只勾选
repo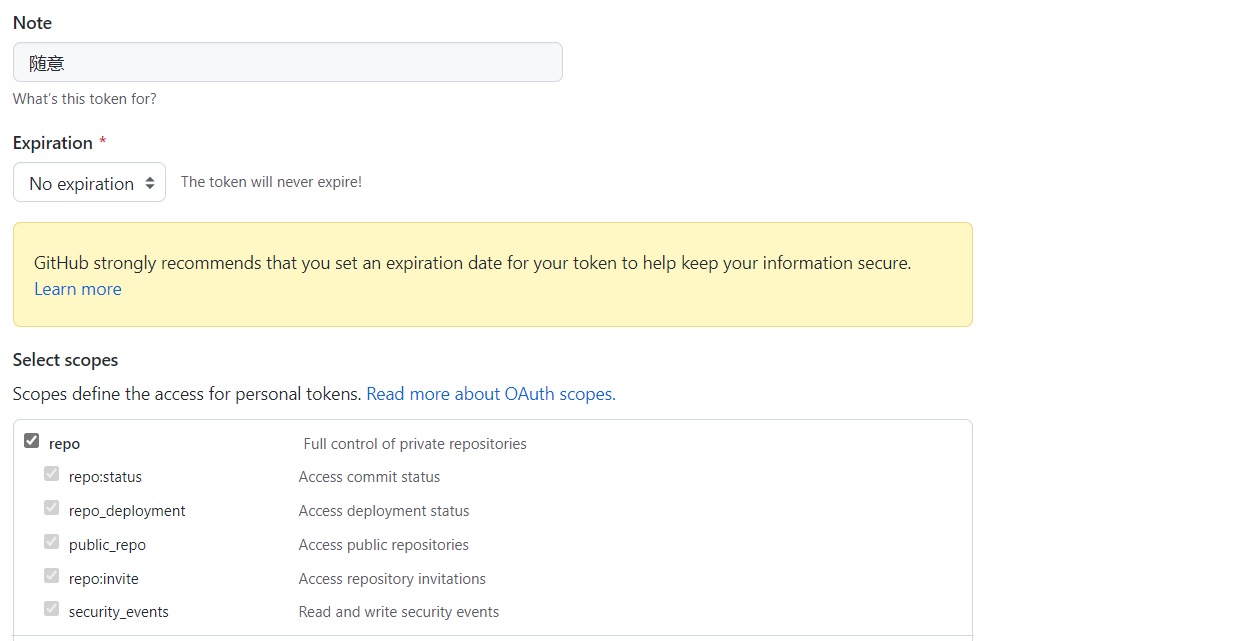
生成了 token 之后一定要记下来,再回来就没法看了
Github actions 配置
进入刚才 博客源码的仓库, 点击 settings
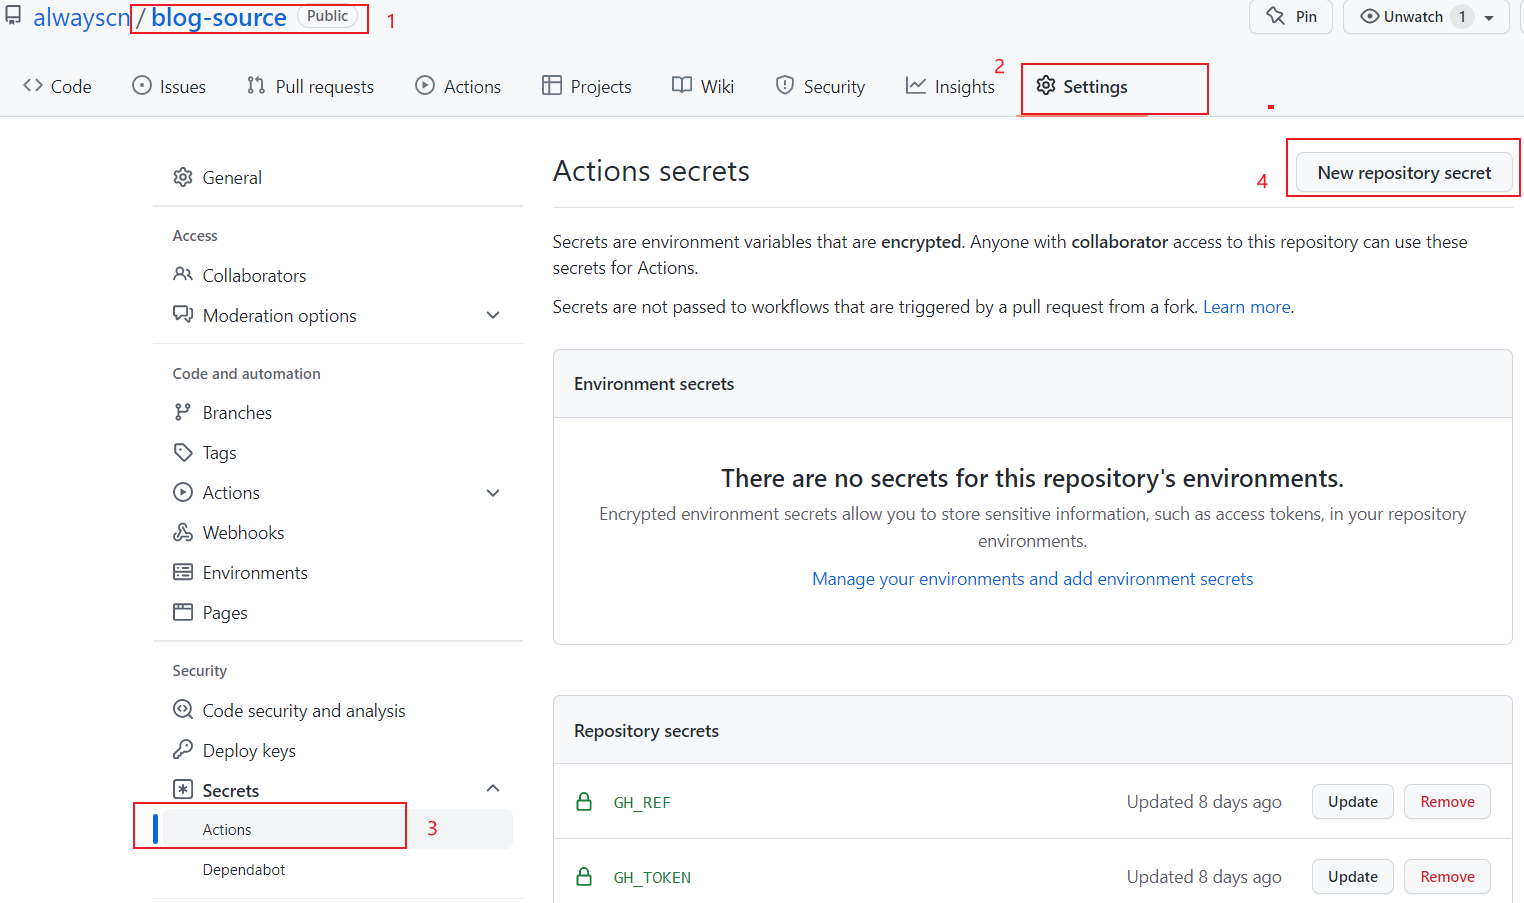
添加两个 Secret
GH_REF 是你博客的仓库地址: github.com/alwayscn/alwaysblog (注意去掉前面 https://)
GE_TOKEN 是刚才生成的 token
Actions 配置
点击 Actions > new workflow > set up a workflow yourself
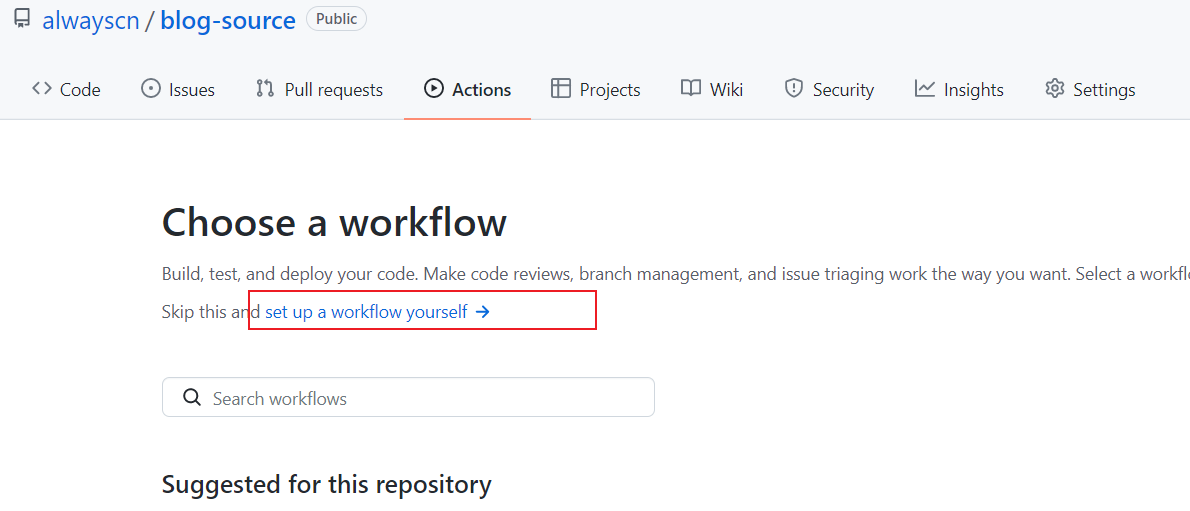
编辑内容如下:
1
2
3
4
5
6
7
8
9
10
11
12
13
14
15
16
17
18
19
20
21
22
23
24
25
26
27
28
29
30
31
32
33
34
35
36
37
38
39
40
41
42
43name: Blog CI/CD
on: [push, repository_dispatch]
jobs:
blog-cicd:
name: Hexo blog build & deploy
runs-on: ubuntu-latest
env:
TZ: Asia/Shanghai
steps:
- name: Checkout codes
uses: actions/checkout@v2
- name: Setup node
uses: actions/setup-node@v1
with:
node-version: '12.x'
- name: Cache node modules
uses: actions/cache@v1
with:
path: ~/.npm
key: ${{ runner.os }}-node-${{ hashFiles('**/package-lock.json') }}
- name: Install dependencies
run: |
npm install hexo-cli -g
npm install yuque-hexo -g
npm install
yuque-hexo sync
- name: Generate files
run: hexo generate
- name: Deploy blog
run: |
git clone "https://${{ secrets.GH_REF }}" deploy_git
mv ./deploy_git/.git ./public/
cd ./public
git config user.name "alwayscn"
git config user.email "123456@outlook.com"
git add .
git commit -m "GitHub Actions Auto Builder at $(date +'%Y-%m-%d %H:%M:%S')"
git push --force --quiet "https://${{ secrets.GH_TOKEN }}@${{ secrets.GH_REF }}" main:mainuser.name 和 user.email 根据自己的情况改一下,注意对齐
弄完之后每当 push 或 repository_dispatch 的时候都会自动的进行更新
配置 Serverless 云函数
- 登录腾讯云,搜索云函数,创建函数

在线编写函数代码
1
2
3
4
5
6
7
8
9
10
11
12
13
14
15
16
17
18
19
20
21
22
23
24
# -*- coding: utf-8 -*-
"""
-----------------------
# Author: 张小剩
# Desc:
-----------------------
"""
import requests
def main_handler(event, context):
r = requests.post("https://api.github.com/repos/alwayscn/blog-source/dispatches",
json = {"event_type": "run-it"},
headers = {"User-Agent":'curl/7.52.1',
'Content-Type': 'application/json',
'Accept': 'application/vnd.github.everest-preview+json',
'Authorization': 'token Github访问token'
if r.status_code == 204:
return "This's OK!"
else:
return r.status_codepost 请求里只需要改用户名和仓库名(alwayscn/blog-source)后面是固定的
那个 token 是带着的,完整的就是 ‘Authorization’: ‘token xxxxxxxxxxxxxx’(上面生成的 Github token)
测试执行
1)点下面那个测试,返回 This’s OK!
2)同时 github actions 也会收到指令,去执行之前在 main.yml 设定好的指令
触发器配置
触发管理 > 创建一个触发器 > 配置如下图所示

提交后 他会给你一个访问路径,记下来
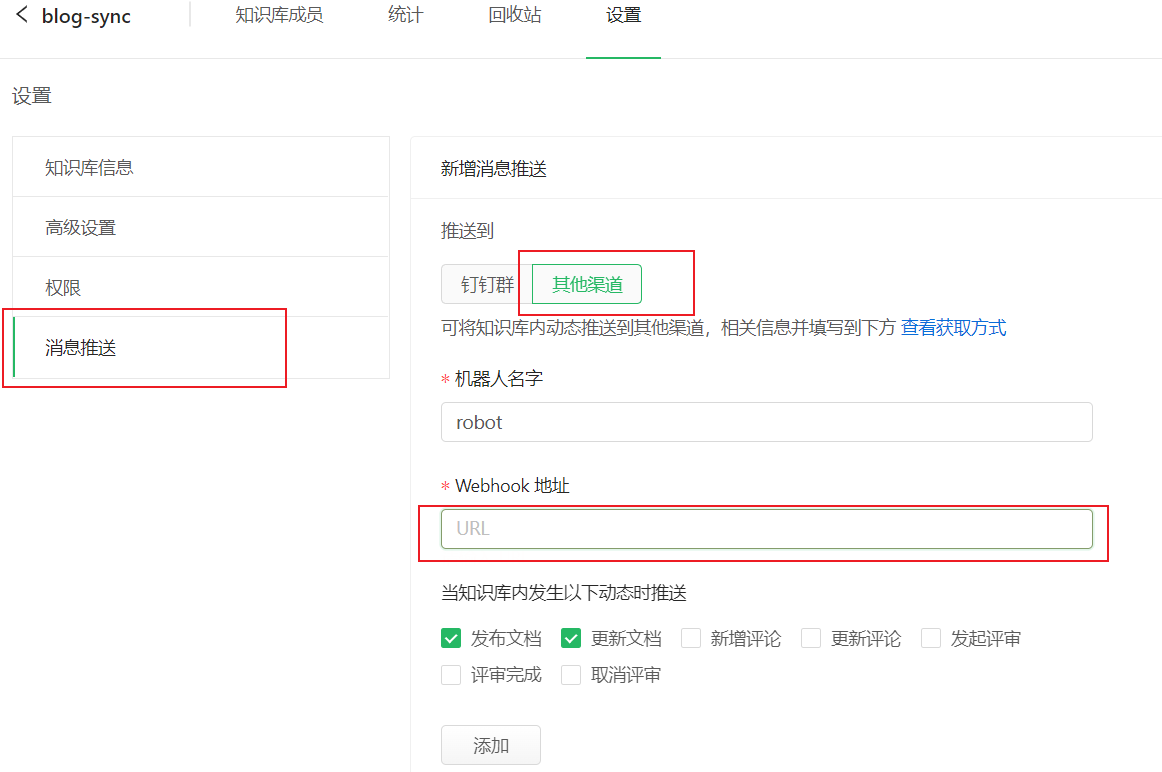
配置语雀 webhook
- 选择 yuque-hexo 绑定的知识库 > 设置 > 消息推送(URL 填写上面 Serverless 生成的访问路径)
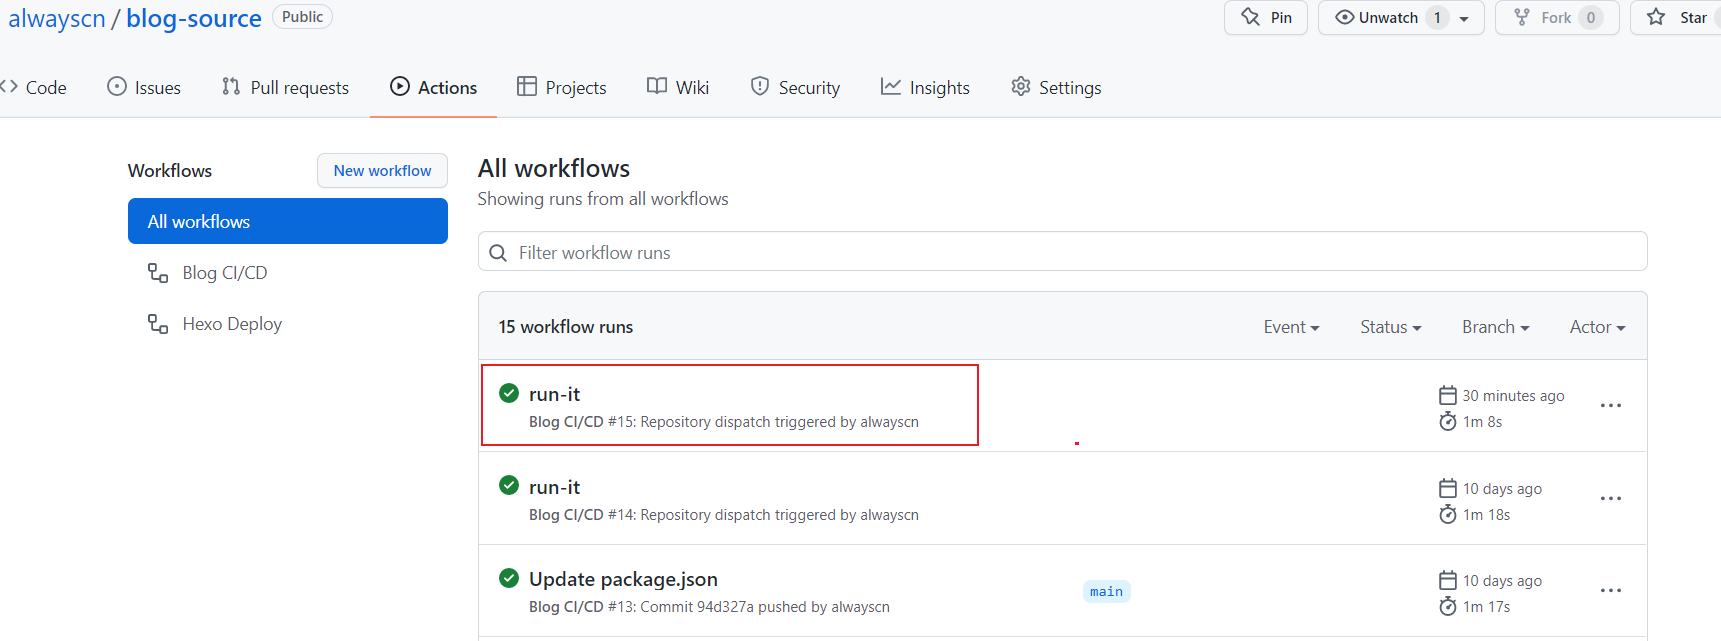
测试触发
点击测试 进入博客源码的仓库查看 Github Actions , 一段时间后就成下面那个绿色的对号了,然后去访问一下博客,看看是否正常。可以的话就证明云函数可以了
之后知识库进行发布、更新、删除文章等操作,只要选择
文档有较大更新,推送给关注者即可自动触发 webhook, 文章也就可以同步到自己的博客了